Planting Bulbs for Spring Beauty

Choosing Bulbs

The first and most important part of growing a beautiful bulb garden is choosing high quality bulbs.  Bulbs should be plump and firm.  It is best to avoid any that are soft or mushy or are moldy.  Be sure to buy the largest bulbs of the variety; smaller bulbs generally have fewer blooms.

Find the right spot

Most bulbs thrive in full sun and well-drained soil.  Even if you buy great bulbs, the wrong conditions can cause blooming failure.

Plant Bulbs at the Right Time

Spring blooming bulbs should be planted in September or October when the ground temperatures have cooled.  In fact, planting in November is not unheard of as long as the ground is not frozen to the point where digging isn’t possible.

How Deep And In What Direction Should Bulbs be Planted?

The rule of thumb for planting bulbs is two to three times deeper than the bulb is tall.  For example, a 3-inch-tall bulb should be planted 6 to 8 inches deep.  Most bulbs have planting directions to follow if you’re not certain.  Another thing to keep in mind is planting too deep is better than too shallow. You can find charts like the one above online.

On bulbs like tulips and daffodils, it is obvious which end is pointed.  The pointed end is planted toward the sky.  For those where the pointed end isn’t obvious, lay the bulbs on their side. 

Planting Methods

How you plant your bulbs depends upon your planting bed.  Bulbs can be planted in mass for a large block of color.  If you choose to plant in individual holes the easiest way is to use a bulb auger.  Augers may be purchased in different sizes to attach to a drill.  I would suggest an electric drill as they typically have more power and don’t require interruptive charging when doing a large planting.  Another form of planting is the bouquet method.  The bouquet method is where several bulbs, 5 – 7, are placed in the same hole.  When the flowers grow, they will look like a bouquet.  The bulbs should be put in the same hole, but not touching.  Another method is to place the bulbs in a trench.  This works well when trying to create a border.

A way to make a great show of color is to plant smaller early blooming bulbs like crocus over the larger bulbs of daffodils and tulips. Additionally, tulips are available as early. mid and late bloomers. So. when looking at the packaging try and get a combination of bloom times so your spring bloom parade goes on for a while!

Deterring Wildlife

This is important……in the spring our furry outdoor friends are hungry and will go for these plants as they emerge. As a rule rabbits and deer DO NOT like daffodils or allium. They DO LOVE tulips. Rabbits will typically snap off the top of the tulips as they come up, and sometimes before you even know they have broken ground. So, spray your tulips in the spring with a deer/rabbit repellent as soon as you notice them. Or, you can cover them with small cages or anything else you can find to protect them. Once they are up about 6 inches the rabbits tend to leave them alone.

Many flower bulbs are edible and they can become tasty snacks for voles, mice, chipmunks, squirrels, gophers, and groundhogs, just to name a few.  Rabbits and deer may also eat bulbs, but are more prone to chomping on the leaves, or uproot and flowering bulbs and eat them whole.


Here are some natural ideas to keep your bulbs safe from becoming critter lunches.

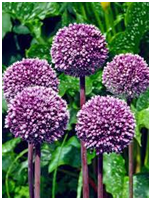
  • The method of companion planting sometimes helps. Planting alliums, castor bean plants, mint, and salvia may deter rodents and other pests.  Other plants pests are not fond of are marigolds, sedum, and strongly scented herbs like lavender.
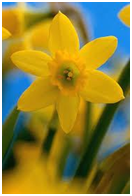
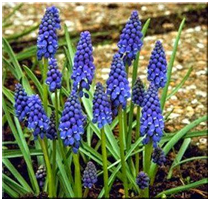
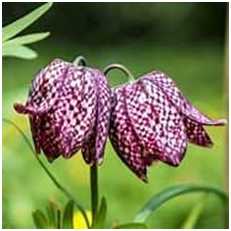
  • Choose bulbs that pests don’t like. Examples are:  Alliums, hyacinths, daffodils, grape hyacinth, snowdrops, and fritillaria.
  • To stop gophers or moles who typically come from underneath the hole, plant your bulbs with gravel. Put gravel in the bottom of your planting holes, cover with a little soil, add your bulb(s), put in a bit more gravel, then finish off with more soil.
  • Try hardware cloth or chicken wire. Similar to the gravel method, layer as follows from bottom to top: hardware cloth or chicken wire, soil, bulb, some soil, hardware cloth or chicken wire, and with soil to cover.
  • Some gardeners have success with decoys. Ask to borrow the rubber snakes your kids have been using to scare their friends.  Place the snakes in a strategic place in your bed.  Rodents are not fond of snakes for obvious reasons, so this can work.  A motion-sensor owl decoy, a string of old CDs, or metal streamers can work as well.
  • Mulch can make digging more difficult, so a thick layer of wood mulch wouldn’t hurt.
  • Repellent sprays can be useful, however, they need to be applied often and after every rain. You might also try coffee grounds, citrus peels, and cinnamon. Sprinkling cayenne pepper also can work.
  • When planting your bulbs, clean up any bulb skins from your bed. You know…the skins are the little pieces of paper-type covering that fall off your bulbs when handled. They can actually attract pests and create a map to where your bulbs are planted.
  • Most pests will go for an easy meal, so if you feed them, away from your bulb plantings, they may go for peanuts and bird seed instead of your bulbs.


Do Fall-Planted Bulbs Need to be Dug in Spring?

Unlike dahlia and gladiola bulbs that are planted in warm soil, fall-planted bulbs do not need to be dug up in spring.  Keep in mind, however, some tulips aren’t reliable after the first year. Daffodils however will multiply from year to year.  To avoid bare areas, it is a good idea to replant each year or fill those areas with annual flowers.

The longer you wait to purchase bulbs, the fewer varieties and numbers of bulbs will be available.  So for a colorful spring bulb garden, get busy now!

And, after doing all the work to plant your bulbs for that beautiful spring garden, no gardener wants to plant just to feed the pests, so do your best to protect them!

Happy planting!